| Felix, qui potuit rerum cognoscere
causas You're fortunate if you know how things work Virgil |
1/10/2013
last updated 7/23
D Vautier
Being an audiophile means I like music and I also collect records. I like to listen to records but I'm not a vinylphile and I need portable music too. The best and only way to do this is to digitize, even though to some this suggests loss of quality. Not so.
To
get good results with digitizing, it's always better to have a quality turntable, cartridge and sound card.
For a long time, I used a Sony turntable, a Technics and some other turntables but
I finally just wound up building my own
turntable because I did not want to deal with all the levers and springs
inside the other turntables along with all the vibrations that these things could
cause. My new machine turned out to be very satisfactory.
Most computers probably need sound cards that are good enough for digitizing like the Asus Xonar DG which is what I use. Finding a sound card that is way quieter than any of the other components is pretty easy to do. A basic preamplifier like the DJ Pre II works well. Any solid state preamp is very quiet. These items together can contribute to good sound capture. The basic LP has been around a long time and will continue to be around a long time.
Storage size for music used to be an issue but not any more. A three minute song in mp3 usually takes about 5 mb of storage. Many storage devices and sticks have 150 gb which therefore can hold 20 to 25 thousand songs.
I have had an interest in recorded music for quite a long time and have been collecting records since childhood. Initially I used to copy them to cassette and 8-track. When digital came along I immediately started doing it since it offered a vast improvement over cassettes and 8-track recording. About 15 years ago I began seriously digitizing. Now I have far better equipment and software but will probably have to do it again when the technology gets even better still. Oh well!
Here's some basic software I like to use. They can be matched and merged:
A capture program that can slice and dice record sides or cassette tracks into files. I use the DAK wave editor and MCH Wavepad. I have been using these a long time and and they seem easy to use. I always capture in .wav format which offers the highest granularity. I do one side of an LP and cut it up into separate wav files. Then I capture the other side.
An editor that does good basic work. Wavepad does fine for me.
A pop and crackle remover is sometimes needed. Clickrepair is good. I use the declick at 10 or 20 percent. DC Millennium works for bad background noises but it's complicated and takes time to learn and can distort complex signals especially trumpets.
Wave to MP3 converter. Tons of these around. I use Switch by MCH.
File Documentation. MP3tag is really good.
Burner. lots around.
Believe me, this whole recording procedure I explain here may sound intimidating, but it's not. I record one or two records every day, usually with excellent results and do it without any trouble. It is true that I have to use several different programs to capture and edit recorded music whether it is from CD, cassette or vinyl. That is because I feel there is no single piece of software that does the whole job well. Vinyl requires RIAA adjustment. The pre-amp does that, but other music media do not require it. Besides good software is not too expensive. Capturing from cassette and 8-track requires manual RIAA adjustment because these devices usually go directly into the PC without a preamp.
I capture in wav format at 48K/16 for music and 32K/16 for talk. I compress to mp3 in variable bitrate for music at 320 and 180 for talk.
My listening devices are many: car radios, zunes, usb sticks, iphones, androids, whatever.
I think it is important to use a good set of earphones when working with music capture. If you try to monitor with speakers you will not always be able to hear the background noise well which can be lost in speakers. Try to listen for noise level. You're not doing this to enjoy the music. It must be considered a technical function. It is also good to have your basic hardware devices operating properly free of hum and noise. Try to get a strong signal but do not distort. Your preamp tells you this. The idea is to leave the background noise far below signal.
 1.
Examine the record or cassette and see if it is worth recording. You have
to play sections because quality is not visible on records.
The cassettes after 1990 have much better signal and capture well. Cassettes
have different attenuation and almost always require high and low end
adjustment (RIAA). Some
vinyl songs may be damaged so they require filters. Some
records may look fine but when they are sampled, they sound terrible.
Forget it, Throw them away. Listen for the labials, "s" sounds and background
hiss. Hiss is hard to remove without compromising signal. Bad "s"s
are impossible to fix but may get better with a good wash. Pops
can be removed easily.
Records can appear damaged and show no evidence of it when played because
the dirt may be only on the ridge. When you have warped records you may only
be able to capture the
inner tracks with a good tone-arm that can follow.
1.
Examine the record or cassette and see if it is worth recording. You have
to play sections because quality is not visible on records.
The cassettes after 1990 have much better signal and capture well. Cassettes
have different attenuation and almost always require high and low end
adjustment (RIAA). Some
vinyl songs may be damaged so they require filters. Some
records may look fine but when they are sampled, they sound terrible.
Forget it, Throw them away. Listen for the labials, "s" sounds and background
hiss. Hiss is hard to remove without compromising signal. Bad "s"s
are impossible to fix but may get better with a good wash. Pops
can be removed easily.
Records can appear damaged and show no evidence of it when played because
the dirt may be only on the ridge. When you have warped records you may only
be able to capture the
inner tracks with a good tone-arm that can follow.
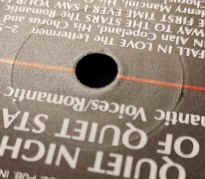
2. Clean the record if it looks dirty. I don't spend a lot of time here because I think the whole thing is overrated. If there are no fingerprints I get away with just dusting. If you listen to portions of the record and hear little clicks, then it needs a good deep cleaning. Always dust just before playing. If you leave a record for just 1 minute on the TT before playing, it has to be re-dusted. Carbon fiber brushes are fine enough to get into the groves. Turn the player on to clean and move in the grove direction. Your stylus, if in good shape, like edges .7 mil or so, only rides half way down the groove. Groove bottoms contain more noise. The stylus should not hit the groove bottom. It's noisy down there.
If I like a record I will go to some extra trouble to clean it, but in general I can't get too excited about cleaning. When I do, I use a highly diluted mild detergent in a spray bottle and my fingers in a soft circular motion and then apply plenty of cold water rinse and air dry by shaking it around.
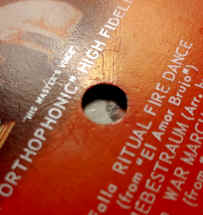
 The
number of plays on a record can be estimated by examining the drag marks
left near the center hole. For most people mounting a record causes this. But
stylus pressure is what ages records and creates bad "s"'s.
The
number of plays on a record can be estimated by examining the drag marks
left near the center hole. For most people mounting a record causes this. But
stylus pressure is what ages records and creates bad "s"'s.
3. Sample sections of the record to get the correct signal strength. Don't overdrive. It's probably better to under drive a little, but when you amplify later you may bring up some noise. The DAK capture software I use for example shows if I am overdriving. My preamp also tells me the signal strength and can be adjusted so that the red light flickers occasionally. Some records have a very strong signal while others do not. The stronger the signal, probably, the lower the background noise. A good recording engineer will see to that. Look for the strongest song on a side and set your volume accordingly. The volumes can change from side to side but not often. Volumes can change even on the same side especially in the case of collections or "greatest hits" stuff. The left or right channel volume may have to be adjusted because sometimes they are not balanced on the record. This occurs with records that were originally monophonic. Songs are difficult to break out In concert albums and in talk shows. You have to be guided by the song times on the label.
4. Record the side. Dust it before dropping the stylus. Then go have a cup of coffee. Set a timer for 15 minutes and go do something else. My TT has no return so I have to watch the timer. Now go back, turn the TT off, and look at the entire waveform before chopping it up. You may have missed on the volume. If the record gets stuck nudge it out and keep recording. You can edit it later. Record other side. Some songs have different volumes which can be adjusted.
5. Put markers between songs. You may sometimes need to zoom in to do this. If your capture software does not have markers I don't know what to tell you. It can be real painful editing an entire side. If it's a live piece you can often recognize the very distinctive clapping signal. Use the song times on the label as a guide in placing markers.
If you are dealing with a concert piece, you need both the jacket and the record in hand as a guide to determine where to put markers based on the time of each selection. Public concerts are hard to break apart but they can be recognized by the clapping.
6. Save the files to a folder. Save in WAV format since it has high granulation. Use a file name that resembles the record, i.e., Dean Martin's Greatest Hits = DeanM-GH-1,2,3,4. This information will be added later on tags but it helps to do it this way in case you forget or make a tagging mistake.
7. Edit each song using good editing software like wavepad. I do at minimum three operations for every song; clean up song ends, remove obvious pops, and adjust volume. Some songs don't need much work but they always need to have the ends cleaned up. I leave one second of zero sound at the beginning unless it's a fade-in. At the end it's often just a 2 second fade-out.
I fade-out the clapping on concert records.
CDs that are ripped to WAV often need volumes adjusted up but no RIAA. Also there is only a very short lead-in and often a long ten second tail on CDs songs (very annoying). Adjust the lead-in to one second and reduce the tail to two seconds. You need the one second lead-in because many players will truncate this later and mp3 adds some time.
On LPs I just about always use clickrepair at a low 10 or 20 percent setting on the WAV file. It does a fine job of preserving the signal and removing those small pesky pops generated by dust particles. It does not seem to affect the signal.
I seldom use the DC Millennium software which has filters where you can sample background noise and apply it but it is dangerous and can distort signal.
I use Wavepad for cleaning up ends and bigger pops. Real bad pops have to be removed manually. If I try to remove big pops automatically with clickrepair at a higher setting it can compromise other signal. But I often run clickrepair at no greater than 10 or 20 percent.
I edit the WAV file which is lossless (does not deteriorate with editing) so I am able to do editing operations many times without degradation.
8. Convert the finished WAV to MP3 or any other media that has Codec level III tags or other tag information. This will allow the addition of documentation which is an absolute must. MP3 reduces file size by around 5 times even at 320 kbps. There's lots of options. Some people recommend VBA. I don't notice a big difference but I use VBA. I use a 320 for music and 156 for talking.
9. Add Documentation; title, artist, album, genre. Use the jacket and record information. Don't forget about cover art which can be added with MP3TAG or other tools. Some players distinguish between the "album artist" field and "contributing artist" field for indexing songs. "album artist" is often indexed but the "contributing artist" field is often used for display purposes depending on your playing device. I will also scan jackets if they have individual song information and put it in the tag comments field.
MP3TAG is very good at finding album information by relying on Doscogs and Musicbrainz and I sometimes try to capture comment information from the record jacket. I use Textbridge for that.
10. Once you do this you have everything needed to play songs anywhere that offer mp3 support, download to I-phone or android, transfer to Zune or a thumb drive or notepad or USB stick for your car or player. The recordings can often be better than youtube stuff.